Consolidation & Filling
 Before a specimen can be molded, it may require treatment by the preparator to improve strength and reduce the possibility of damage occurring when the completed mold is removed. There are two basic types of pre-treatment: consolidation/coating and filling.
Consolidation and coating
Before molding, specimens are generally treated with a dilute adhesive called a consolidant. The consolidant can be used to both impregnate the specimen to impart internal strength (sometimes referred to in preparation as a hardener) as well as coating the surface with a thin but complete layer. This coating helps maintain the surface condition of the specimen and also acts as a release, making it easier to separate the molding material from the specimen during demolding. Two coats of 2-3% Butvar B-76 in acetone often works well for this step. For information on other consolidants see the page on Adhesives and Consolidants in the Revealing section of this site.
One exception to this step is teeth, which are not usually consolidated; the consolidant layer can obscure dental wear patterns and other minute details.
Filling
Fossils contain many holes of various sizes. Some of these are naturally-occurring morphological features of potential importance for research (e.g. foramina). Others are the result of weathering or old breaks. In some places, the specimen may be heavily undercut, presenting a challenge for molding. Filling voids in a specimen is a time-consuming, but critically important step and one that if not done properly can result in damage to the specimen as well as production of a less useful cast that omits important information.
When designing the mold it is important to determine whether these areas contain significant information, and so should not be covered. There will also be areas where liquid rubber can seep in but, once hardened, will cause damage when pulled out and therefore must be filled. A general rule of thumb is that if the hole is bigger on the inside than on the outside – it may need to be covered, filled or the mold must be designed around it.
The goal of the filler is to preserve the fossil during the molding process – it should not cover any more of the bone surface than absolutely necessary to preserve the fossil against breakage. Remember that the resulting cast may be all that a researcher is able to see of this specimen.
The filler is usually scored or otherwise marked to distinguish filling from fossil. Care must be taken to remove any filling material that is not needed. A thin layer of consolidant is applied over the filling. It may be necessary to use a combination of filler materials and techniques on a single specimen.
Choice of filling material is important: the goal is to remove the fill completely once the mold is completed. Good fillers must be easily workable, easily removable, and safe for both the specimen and the preparator. Commonly used fillers include:
• Carbowax
• Cyclododecane
• Microcrystalline wax
• Modeling Clay
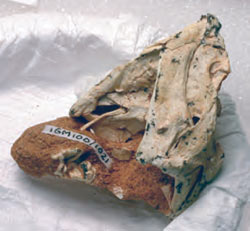
• Paper/tissue
• Adhesive film
Each of these fillers has its own particular properties and not all are suitable in all circumstances. More information on choice of filler in the Revealing section of this site as well as the document Basics of Moldmaking by Marilyn Fox, Preparator at the Peabody Museum of Natural History, Yale University. Download the full document for additional detailed information.
